TorrentBOX是一个开源的用Python3写的多用户BT下载工具,该项目已经烂尾,不过不影响使用。所以我还是尝试着部署了一下,只能说坑是真的太多了。。。
因为这个项目依赖python3和libtorrent,而CentOS7上面的python最高只支持到2.7,所以我们得先想办法装个python3上去,虽然方法很多,比如之前我一直常用的pyenv,但是我测试了pyenv安装的python3不能应用在这个项目上。所以我想到了用CentOS的scl工具。好,现在python3是安装上去了,但是我们还得让这个全新的python3能够导入libtorrent,而libtorrent在CentOS上也没有现成可用的包,所以只能去编译,但是众所周知编译libtorrent又依赖于boost这个C++库,而CentOS用yum安装的boost库是基于python2.7的,所以我们还得去编译一遍boost。。。。。。
所以我们要搭建这个TorrentBOX,首先得在系统上安装一个python3+boost库+libtorrent,这几个玩意在编译的过程中实在是太蛋疼,下面我记录的这个编译方法,只是在我自己的机器上测试通过可用,别的机器上如有问题,请勿留言,自己折腾吧。。。
先更新系统:
yum -y update
安装EPEL源:
yum -y install epel-release
安装开发工具包:
yum -y groupinstall "Development Tools"
安装SCL源:
yum -y install centos-release-scl
安装Python3.6:
yum -y install rh-python36
把当前shell的Python版本切换为3.6:
scl enable rh-python36 bash
安装编译boost所需的依赖:
yum -y install zlib-devel bzip2-devel
下载boost源码包解压并进入到目录:
wget https://dl.bintray.com/boostorg/release/1.68.0/source/boost_1_68_0.tar.gz
tar -xzvf boost_1_68_0.tar.gz
cd boost_1_68_0
使用下面的参数进行配置:
./bootstrap.sh --with-libraries=all --with-python=/opt/rh/rh-python36/root/usr/bin/python3 --with-python-root=/opt/rh/rh-python36/root/usr/bin --with-python-version=3.6
完成之后编辑这个配置文件:
vi project-config.jam
复制下面这段代码:
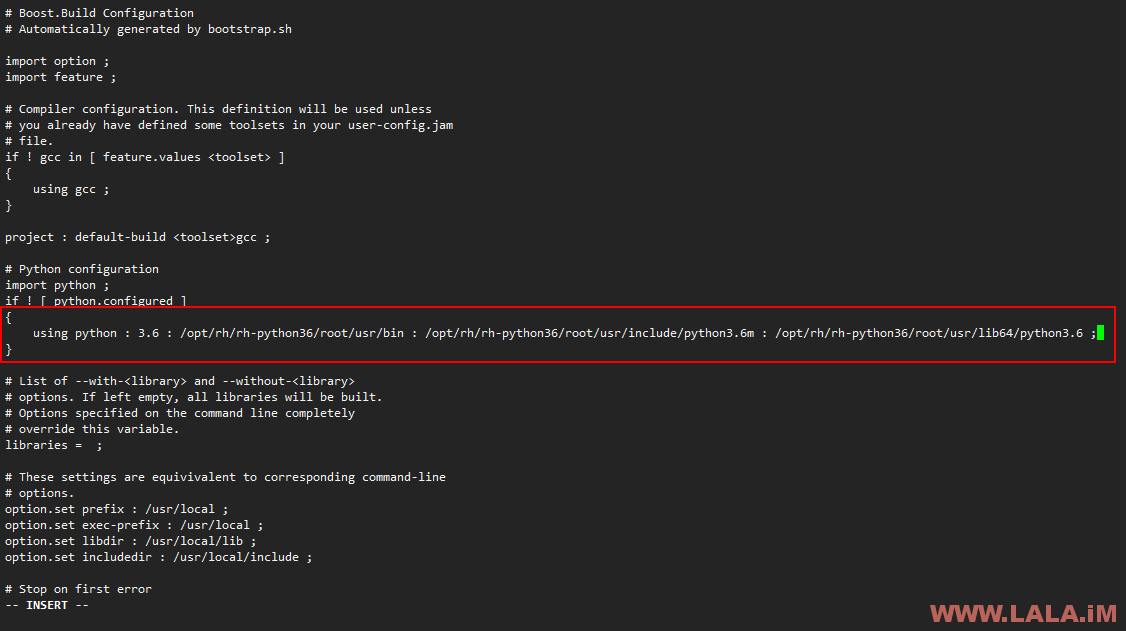
using python : 3.6 : /opt/rh/rh-python36/root/usr/bin : /opt/rh/rh-python36/root/usr/include/python3.6m : /opt/rh/rh-python36/root/usr/lib64/python3.6 ;
直接替换掉如图红框标注的位置:

开始编译,并使用C++11:
./b2 cxxflags="--std=c++11" -j2
完成之后把Boost库直接安装到usr这个路径下面,这样可用省去配置环境变量的步骤,如果你安装在别的位置了,就自己ldconfig一下吧。
./b2 install --prefix=/usr
现在安装编译libtorrent所需的依赖:
yum -y install gcc gcc-c++ qt-devel openssl-devel qt5-qtbase-devel qt5-linguist
下载libtorrent源码包解压并进入到目录内:
cd
wget https://github.com/arvidn/libtorrent/releases/download/libtorrent_1_1_11/libtorrent-rasterbar-1.1.11.tar.gz
tar -zxf libtorrent-rasterbar-1.1.11.tar.gz
cd libtorrent-rasterbar-1.1.11
使用如下参数进行配置:
./configure CXXFLAGS=-std=c++11 --prefix=/usr --with-boost-libdir=/usr/lib --enable-python-binding --with-libiconv
之后编辑如下文件:
vi bindings/python/compile_flags
在这个文件的尾部加上如下参数:
-std=c++11
如图所示:

开始编译并完成安装:
make -j2
make install
创建4个软连接:
ln -s /usr/lib64/python3.6/site-packages/libtorrent.cpython-36m-x86_64-linux-gnu.so /opt/rh/rh-python36/root/usr/lib64/python3.6/site-packages/libtorrent.cpython-36m-x86_64-linux-gnu.so
ln -s /usr/lib64/python3.6/site-packages/python_libtorrent-1.1.11-py3.6.egg-info /opt/rh/rh-python36/root/usr/lib64/python3.6/site-packages/python_libtorrent-1.1.11-py3.6.egg-info
ln -s /usr/lib/pkgconfig/libtorrent-rasterbar.pc /opt/rh/rh-python36/root/usr/lib64/pkgconfig/libtorrent-rasterbar.pc
ln -s /usr/lib/libtorrent-rasterbar.so.9 /opt/rh/rh-python36/root/usr/lib64/libtorrent-rasterbar.so.9
现在执行如下命令检查我们的python3是否可用正常import:
python3 -c "import libtorrent; print (libtorrent.version)"
如果一切正常,那么将回显出libtorrent的版本号:

OJBK,最难最坑最蛋疼的部分你已经完成了,下面我们安装RabbitMQ:
yum -y install https://github.com/rabbitmq/erlang-rpm/releases/download/v21.1.4/erlang-21.1.4-1.el7.centos.x86_64.rpm
yum -y install https://github.com/rabbitmq/rabbitmq-server/releases/download/v3.7.9/rabbitmq-server-3.7.9-1.el7.noarch.rpm
systemctl start rabbitmq-server
systemctl enable rabbitmq-server
现在拉取项目文件并进入到项目目录:
git clone https://github.com/L34p/TorrentBOX.git
cd TorrentBOX
安装项目所需依赖并初始化数据库:
pip3 install -r requirements.txt
python3 manage.py migrate
安装screen:
yum -y install screen
screen开第一个窗口运行:
screen -S one
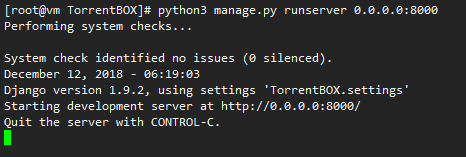
python3 manage.py runserver 0.0.0.0:8000
如果正常会有类似如图回显:

screen开第二个窗口运行:
screen -S two
export C_FORCE_ROOT="true"
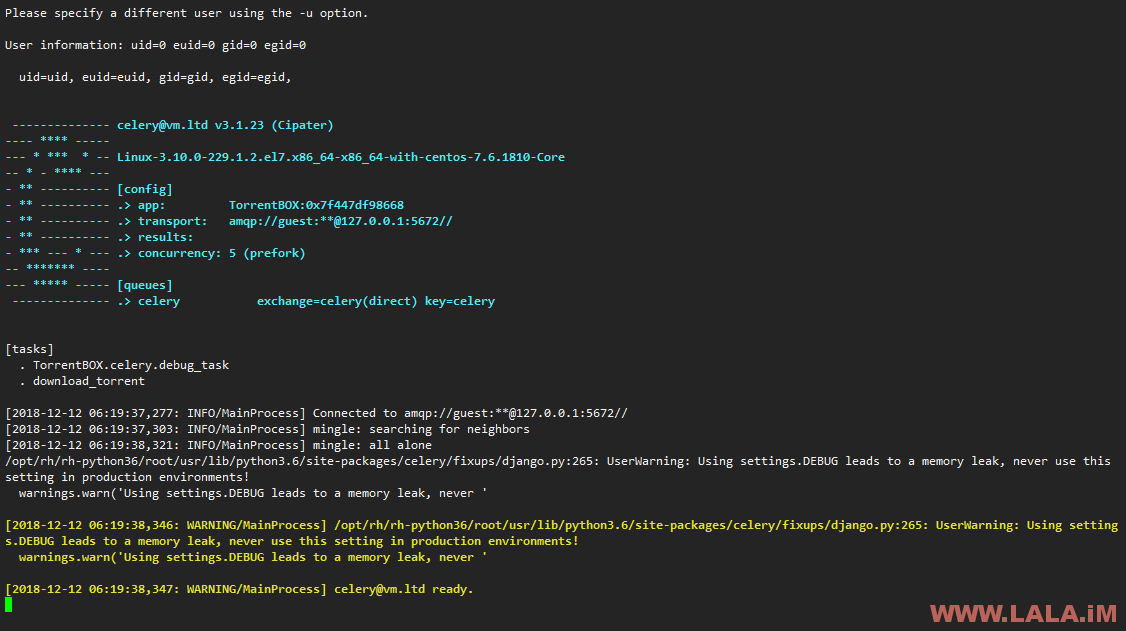
python3 manage.py celeryd --loglevel info --concurrency 5
如果正常会有类似如图回显:

现在打开你的VPS公网IP+端口8000应该可以访问到这个程序的登录界面了:

测试可以正常下载:

下载完成之后会出现一个拖回本地的按钮,点一下就可以把文件下载到本地了:

绑定域名什么的就不写了,用Nginx反代一下应该就可以了。。。值得一提的是,我们使用scl安装的Python3环境不会影响到系统本身的环境,这个就相当于一个虚拟环境,退出shell再登录Python就会还原成默认版本,如需启用就再scl一遍就行。
为了他妈下个种子也算是绞尽了脑汁,回头一想还好这个TorrentBOX有个多用户功能,还行不亏吧。。。
强行不亏吧。。。


最新评论
5211314
能不能教我 一点不会