因手头上没有空闲的独服了,所以随便找台VPS折腾一下。既KVM虚拟机安装Proxmox,然后用Proxmox开LXC小鸡,LXC小鸡内再安装Docker,无限套娃233
LXC内运行Docker的好处是显而易见的,简而言之LXC比KVM轻很多。以下实验步骤是在Linode的一台1C1G/Debian10上完成的。
安装PVE6.X,装完之后重启:
echo "deb http://download.proxmox.com/debian/pve buster pve-no-subscription" > /etc/apt/sources.list.d/pve-install-repo.list
wget http://download.proxmox.com/debian/proxmox-ve-release-6.x.gpg -O /etc/apt/trusted.gpg.d/proxmox-ve-release-6.x.gpg
apt -y update && apt -y full-upgrade
apt -y install proxmox-ve postfix open-iscsi
reboot
VPS没有多IP,只能开NAT小鸡了,编辑网卡配置文件:
nano /etc/network/interfaces
在原有的配置基础上增加vmbr0网卡的配置即可:
# This file describes the network interfaces available on your system
# and how to activate them. For more information, see interfaces(5).

source /etc/network/interfaces.d/*

# The loopback network interface
auto lo
iface lo inet loopback

# The primary network interface
allow-hotplug eth0
iface eth0 inet dhcp

auto vmbr0
iface vmbr0 inet static
        address 192.168.0.1
        netmask 255.255.255.0
        bridge_ports none
        bridge_stp off
        bridge_fd 0
        post-up echo 1 > /proc/sys/net/ipv4/ip_forward
        post-up iptables -t nat -A POSTROUTING -s '192.168.0.0/24' -o eth0 -j MASQUERADE
        post-down iptables -t nat -D POSTROUTING -s '192.168.0.0/24' -o eth0 -j MASQUERADE
重启网络服务使更改生效:
systemctl restart networking.service
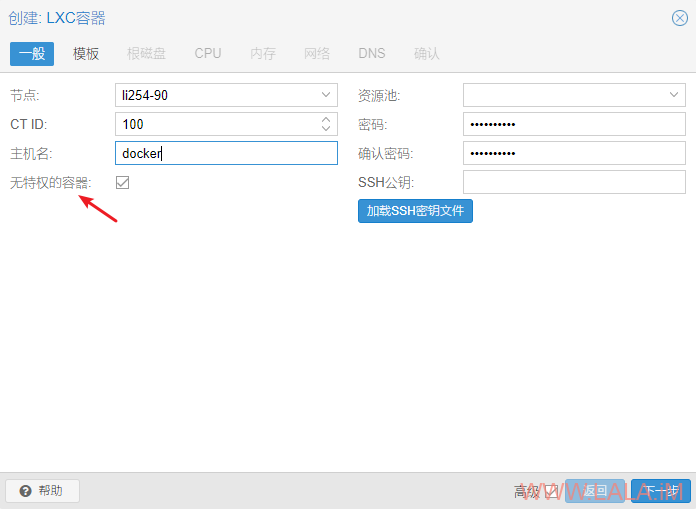
登录PVE面板后创建小鸡的时候需要注意两点,其一是勾选“无特权的容器”:
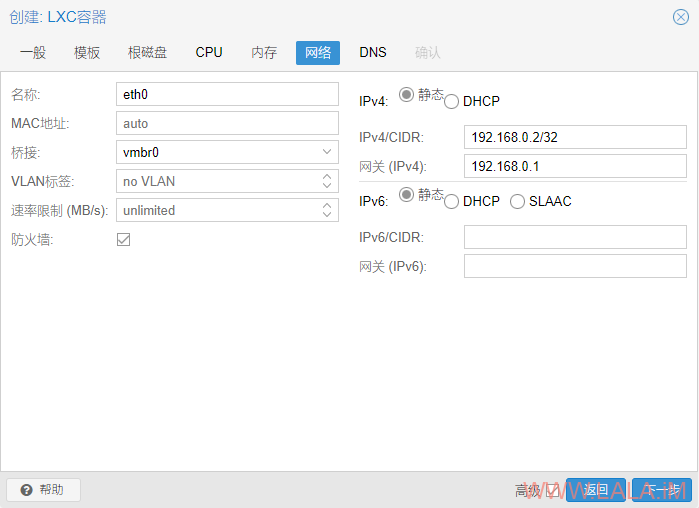
其二是配置好网络,桥接vmbr0,设置网关和小鸡的IP:
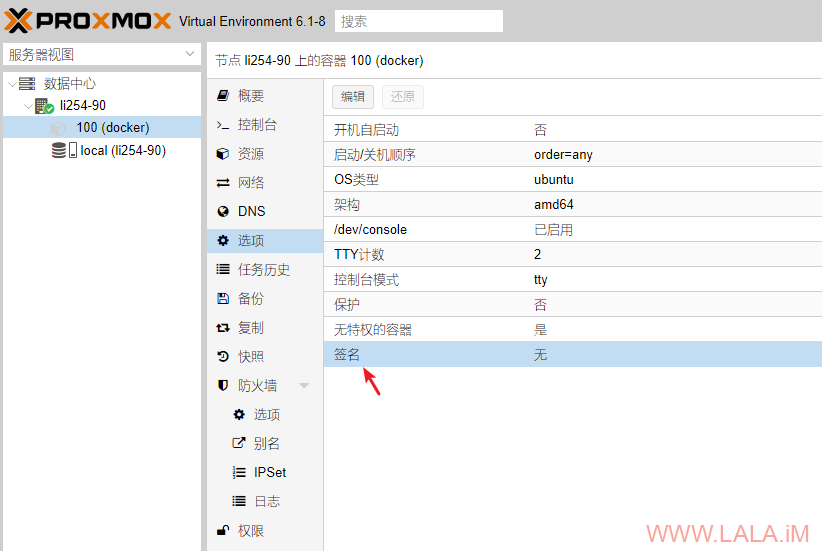
小鸡创建好了之后,点选项-签名:
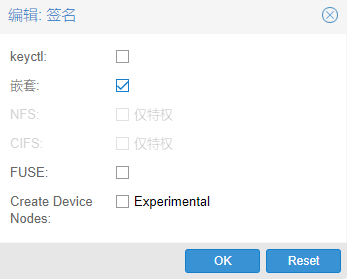
勾选嵌套:
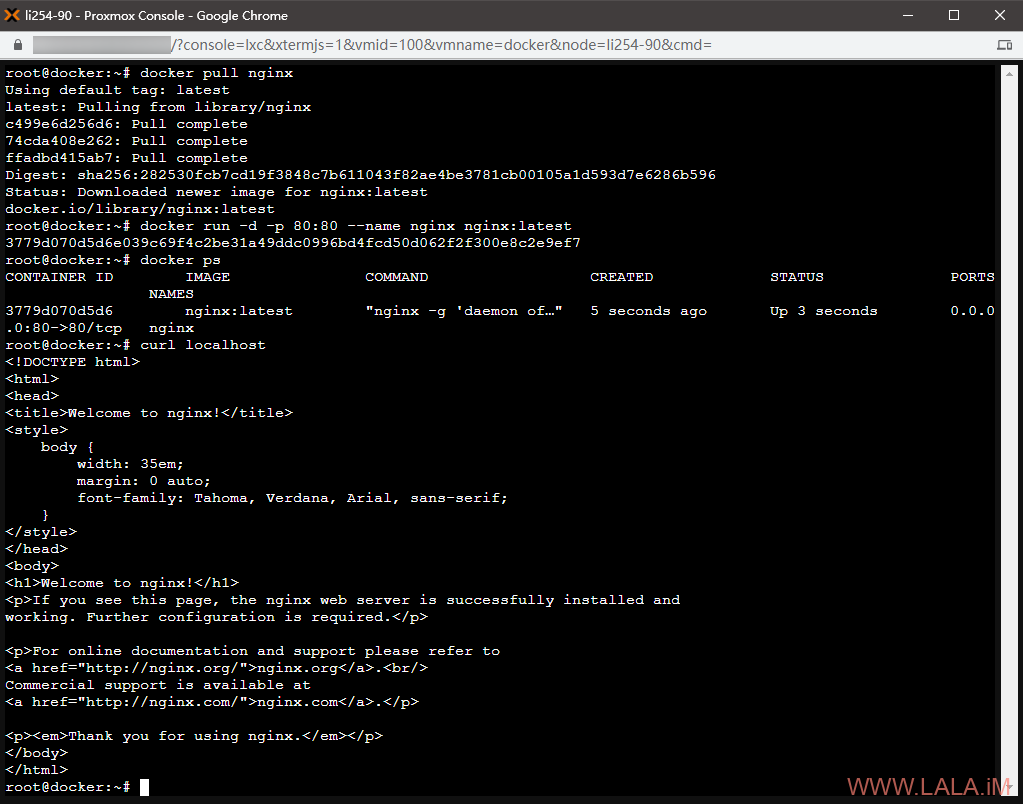
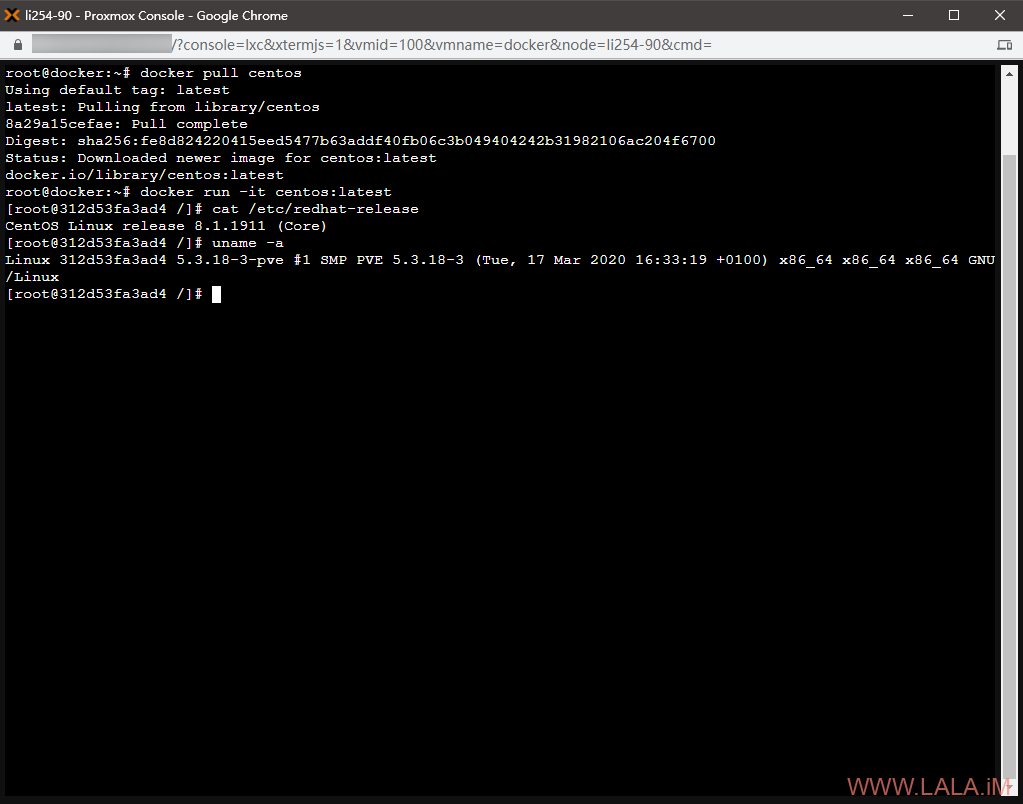
配置好了就可以启动了,在LXC内启动几个Docker容器试试看。
跑个NGINX看看:
跑个CentOS8看看:


最新评论
5211314
能不能教我 一点不会