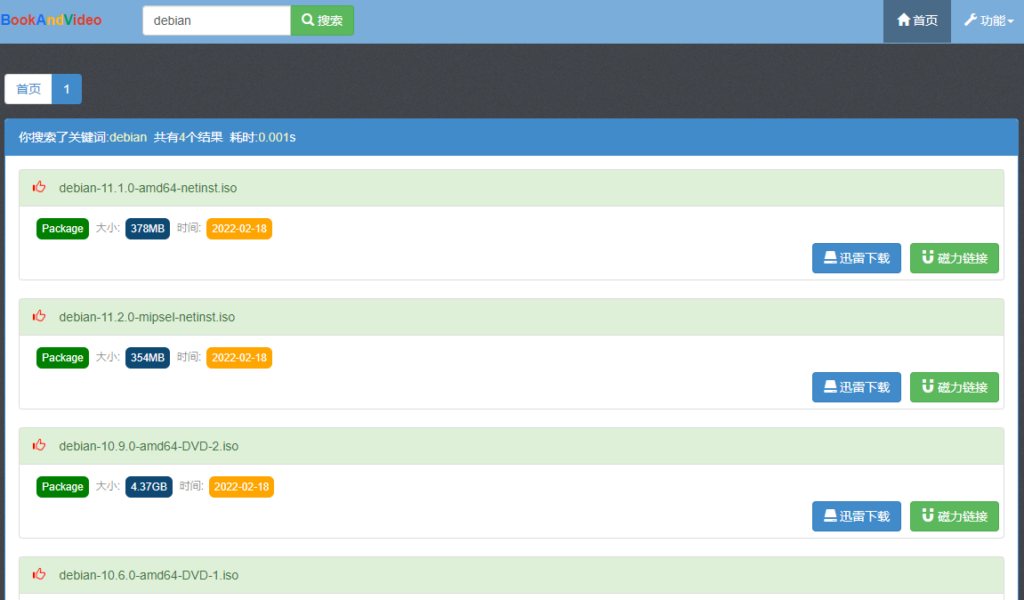
这个程序比较吃配置,建议用独服跑。作者最近更新的版本可能是有问题,搭建好了后搜索不到数据,后来我又试了下搭建旧版是可以正常用的,所以这里记录一下搭建旧版的过程。
这个项目是前几天别人告诉我的,他自己可能是搭建不成功想让我搭建试试,我也是弄了比较长的时间,最后他自己也搭建好了,不过和我一样都是只有旧版是正常的,就有点尴尬。。
不过我看了下作者的git提交记录,似乎新版和旧版没什么太大的区别,旧版用着也没啥问题。。
系统我这边用的是debian11,先把需要的基本环境装一装。。
安装wget/git/curl/python3/pip3:
apt -y update
apt -y install wget git curl python3 python3-pip
安装go环境:
wget https://go.dev/dl/go1.17.7.linux-amd64.tar.gz
tar -C /usr/local -xzf go1.17.7.linux-amd64.tar.gz
echo 'export PATH=$PATH:/usr/local/go/bin' > /etc/profile.d/golang.sh
source /etc/profile.d/golang.sh
程序需要用到mongodb和es,但是由于种种原因mongodb和es都不能用最新的版本,所以这里选择用docker来运行旧版本,先安装docker/docker-compose:
curl -fsSL https://get.docker.com -o get-docker.sh
sh get-docker.sh
curl -L https://github.com/docker/compose/releases/download/1.29.2/docker-compose-`uname -s`-`uname -m` -o /usr/local/bin/docker-compose
chmod +x /usr/local/bin/docker-compose
安装mongo-connector,这个东西的主要作用是把mongodb的数据同步到es内:
pip3 install mongo-connector
pip3 install 'elastic2-doc-manager[elastic5]'
pip3 install 'mongo-connector[elastic5]'
装好之后降级pymongo,否则后续报错运行不了:
pip3 install pymongo==3.9
拉取项目文件并切换到旧版本:
cd /opt
git clone https://github.com/Bmixo/btSearch.git btsearch
cd btsearch
git checkout 04852773893c79b503fa4bb5a71e80598620ed0b
把程序编译出来,这里需要编译3个部分,分别是web/worker/server,编译完成后在对应的目录会有二进制文件可用:
cd web
go build
cd ../worker/
go build
cd ../server/
go build
在项目的根目录内新建docker-compose文件:
cd /opt/btsearch && nano docker-compose.yml
写入如下内容:
version: '3.5'

services:
  mongo:
    image: mongo:3.6.0
    restart: unless-stopped
    ports:
      - 127.0.0.1:27017:27017
    volumes:
      - ./mongodb_data:/data/db
    command: "--bind_ip_all --replSet rs0"

  es:
    image: docker.elastic.co/elasticsearch/elasticsearch:5.6.0
    restart: unless-stopped
    environment:
      - "ES_JAVA_OPTS=-Xms1024m -Xmx1024m"
      - "discovery.type=single-node"
      - "bootstrap.memory_lock=true"
    ports:
      - 127.0.0.1:9200:9200
      - 127.0.0.1:9300:9300
    volumes:
      - esdata:/usr/share/elasticsearch/data
      - esplugins:/usr/share/elasticsearch/plugins
      - esconfig:/usr/share/elasticsearch/config
    ulimits:
      memlock:
        soft: -1
        hard: -1
    healthcheck:
      test: ["CMD-SHELL", "curl --silent --fail localhost:9200/_cluster/health || exit 1"]

volumes:
  esdata:
  esplugins:
  esconfig:
为了让程序本身和mongo-connector这个中间件能够正常运行,mongodb和es这两个容器都是很旧的版本,估计都是有很多安全漏洞的。
所以我们在这里把mongodb和es的端口都监听在本地,一般就不会有什么大问题了。确认配置无误后up起来:
docker-compose up -d
现在需要初始化mongodb副本集,先进到容器内:
docker exec -it btsearch_mongo_1 mongo
执行如下命令初始化副本集:
rs.initiate()
mongodb默认会随机分配一个主机名,这会让在外部的mongo-connector连接不上,所以这里把主机名改成mongo-connector能识别的,改完之后退出容器:
cfg = rs.conf()
cfg.members[0].host = "localhost:27017"
rs.reconfig(cfg)
exit
现在进到es容器内安装ik分词插件:
docker exec -it btsearch_es_1 /bin/bash
执行如下命令安装,安装完成后退出容器:
./bin/elasticsearch-plugin install https://github.com/medcl/elasticsearch-analysis-ik/releases/download/v5.6.0/elasticsearch-analysis-ik-5.6.0.zip
exit
重启es容器:
docker-compose restart es
配置分词器,elastic:changeme是es的默认账号和密码不需要更改:
curl --user elastic:changeme -XPUT http://localhost:9200/bavbt -H 'Content-Type: application/json'
curl --user elastic:changeme -XPOST 'localhost:9200/bavbt/_close'
curl --user elastic:changeme -XPUT localhost:9200/bavbt/_settings?pretty -d '{
"index":{
"analysis" : {
            "analyzer" : {
                "default" : {
                    "type" : "ik_max_word"
                }
            },
	    "search_analyzer" : {
                "default" : {
                    "type" : "ik_max_word"
                }
            }
        }
    }
}'
curl --user elastic:changeme -XPOST 'localhost:9200/bavbt/_open'
现在编辑worker的配置文件:
nano /opt/btsearch/worker/config/worker_example.conf
设置verifyPassord:
[worker]
listenerAddr=0.0.0.0:9898
findNodeSpeed=9999
nodeChanSize=10000
udpPort=6999
verifyPassord=password
编辑server的配置文件:
nano /opt/btsearch/server/config/server_example.conf
设置verifyPassord与worker的保持一致,同时worker是可以部署多台机器上的,如果有多个worker运行的话这里的wkNodes可以用逗号分隔来配置多个。其他的配置保持默认即可:
[server]
wkNodes=127.0.0.1:9898
verifyPassord=password
metadataNum=10
banList=config/banList.txt
[mongodb]
musername=
mpassword=
database=bavbt
collection=torrent
addr=127.0.0.1:27017
[redis]
redisEnable=false
redisAddr=localhost:6379
redisPassword=
redisDB=0
编辑web的配置文件:
nano /opt/btsearch/web/config/server.conf
一般情况下保持和下面的配置一致即可:
[mongodb]
musername=
mpassword=
database=bavbt
collection=torrent
addr=127.0.0.1:27017
[elasticsearch]
url=http://127.0.0.1:9200/bavbt/torrent/
eusername=elastic
epassword=changeme
[webServer]
webServerAddr=0.0.0.0:7878
接下来分别运行worker/server/web,这里你也可以用systemd或者supervisor来配置进程守护,我为了方便调试就临时用screen了:
apt -y install screen
启动worker:
screen -S worker
cd /opt/btsearch/worker
./worker -c config/worker_example.conf
启动server:
screen -S server
cd /opt/btsearch/server
./server -c config/server_example.conf
启动web:
screen -S web
cd /opt/btsearch/web
./web -c config/server.conf
接下来再开一个screen,用于mongo-connector:
screen -S mongo
执行下面的命令启动mongo-connector:
mongo-connector -m mongodb://localhost:27017/?unicode_decode_error_handler=ignore -t http://elastic:changeme@localhost:9200/torrent -d elastic2_doc_manager -n bavbt.torrent -i name,length,hot,create_time,category,infohash
等待片刻,如果正常的话,执行下面的命令,应该可以检索到es内的数据:
curl --user elastic:changeme 127.0.0.1:9200/bavbt/torrent/_search?pretty=true
访问你的ip:7878应该能够打开web页面:
试试搜索:
后续我发现一个小问题,es重启后mongo-connector就不能正常同步数据,把目录内的oplog.timestamp文件删了就可以了。
[可选]配置反向代理,安装nginx/certbot:
apt -y install nginx python3-certbot-nginx
新建nginx站点配置文件:
nano /etc/nginx/conf.d/btsearch.conf
写入如下配置:
server {
    listen       80;
    server_name  bt.example.com;
    client_max_body_size 0;

    error_log /var/log/nginx/btsearch.error.log;
    access_log /var/log/nginx/btsearch.access.log;

    location / {
        proxy_pass http://127.0.0.1:7878;
        proxy_set_header X-Real-IP $remote_addr;
        proxy_set_header X-Forwarded-For $proxy_add_x_forwarded_for;
        proxy_set_header Host $host;
    }
}
签发ssl证书:
certbot --nginx
参考:
https://github.com/Bmixo/btSearch
https://github.com/yougov/mongo-connector/issues/391
https://github.com/yougov/mongo-connector/wiki/Getting-Started


最新评论
5211314
能不能教我 一点不会