几年前写过一篇部署Misskey的文章,时过境迁,我的那篇部署文章已经过时,因为Misskey发生了天翻地覆的变化,连数据库都从mongodb换成了postgresql。。今天在这里记录一下Misskey新版本的部署过程。
安装docker、nginx、certbot:
apt -y update
apt -y install curl nginx python3-certbot-nginx
curl -fsSL https://get.docker.com -o get-docker.sh
sh get-docker.sh
克隆项目存储库:
cd /opt
git clone -b master https://github.com/misskey-dev/misskey.git
cd misskey
git checkout master
复制配置文件:
cp .config/example.yml .config/default.yml
cp .config/docker_example.env .config/docker.env
编辑default.yml:
nano .config/default.yml
你至少需要改动以下配置:
url: https://misskey.example.com // 你的实例域名

db:
  host: db // postgresql的主机,应与docker-compose.yml内的services名保持一致
  port: 5432
  db: misskey // 设置你的数据库名
  user: misskey // 设置你的数据库用户名
  pass: password // 设置你的数据库用户密码

redis:
  host: redis // redis的主机,应与docker-compose.yml内的services名保持一致
  port: 6379
编辑docker.env:
nano .config/docker.env
在这里配置好你在default.yml里面填写的数据库信息:
POSTGRES_PASSWORD=password
POSTGRES_USER=misskey
POSTGRES_DB=misskey
构建镜像并初始化数据库:
docker compose build
docker compose run --rm web yarn run init
完成之后即可启动Misskey:
docker compose up -d
接下来配置nginx反向代理,新建nginx配置:
nano /etc/nginx/sites-available/misskey
写入如下配置:
map $http_upgrade $connection_upgrade {
    default upgrade;
    ''      close;
}

proxy_cache_path /tmp/nginx_cache levels=1:2 keys_zone=cache1:16m max_size=1g inactive=720m use_temp_path=off;

server {
    listen 80;
    listen [::]:80;
    server_name misskey.example.com;
    client_max_body_size 0;

    location / {
        proxy_pass http://127.0.0.1:3000;
        proxy_set_header Host $host;
        proxy_http_version 1.1;
        proxy_redirect off;

        proxy_set_header X-Real-IP $remote_addr;
        proxy_set_header X-Forwarded-For $proxy_add_x_forwarded_for;
        proxy_set_header X-Forwarded-Proto https;

        proxy_set_header Upgrade $http_upgrade;
        proxy_set_header Connection $connection_upgrade;

        proxy_cache cache1;
        proxy_cache_lock on;
        proxy_cache_use_stale updating;
        add_header X-Cache $upstream_cache_status;
    }
}
启用新的nginx配置:
ln -s /etc/nginx/sites-available/misskey /etc/nginx/sites-enabled/misskey
签发ssl证书:
certbot --nginx
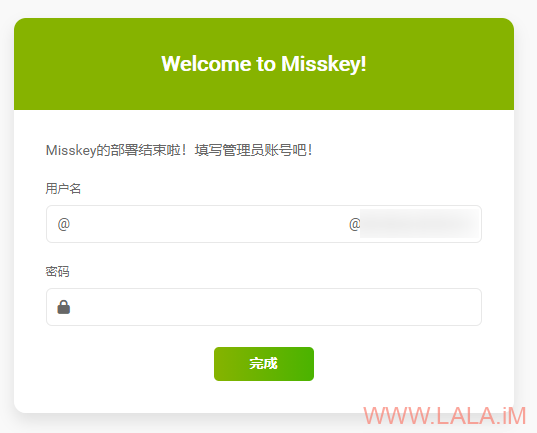
访问你的域名如果正常即可创建管理员账号:
预览:
补充:
由于misskey依赖nodejs,而构建docker镜像的时候nodejs会占用比较多的内存,小内存机器可能会构建失败。
如果你的机器内存不够可以直接用dockerhub上面的镜像:https://hub.docker.com/r/misskey/misskey
另外建议在配置好反向代理后将docker-compose.yml内暴露的3000端口修改为仅监听在本地:
ports:
  - "127.0.0.1:3000:3000"
也可以看看:
https://misskey-hub.net/en/docs/install.html
https://misskey-hub.net/en/docs/admin/nginx.html


最新评论
5211314
能不能教我 一点不会