因众所周知的原因,现在国内的机器访问不了dockerhub了,所以自建一个dockerhub的镜像服务还是很有必要的。
机器配置最好要有4GB内存,因为这个Nexus3是JAVA开发的,比较吃内存,当然它的功能也很丰富,不但可以创建Docker的Repo,还可以创建诸如yum、apt、npm等众多Repo。。当然这些不是今天的重点。。
然后硬盘尽可能的大一点吧,因为会缓存内容到本地。CPU如果低于4核心管理员界面的右上角会有一个警告,不过一般自己用的话1-2核心也足够了。
安装Docker和需要用到的软件包:
apt -y update
apt -y install curl wget nginx python3-certbot-nginx
curl -fsSL https://get.docker.com -o get-docker.sh
sh get-docker.sh
新建docker-compose.yml文件:
mkdir -p /opt/nexus3 && cd /opt/nexus3 && nano docker-compose.yml
写入如下配置:
services:
 nexus3:
   image: sonatype/nexus3
   container_name: nexus3
   restart: unless-stopped
   ports:
     - "8081:8081"
   volumes:
     - ./nexus-data:/nexus-data
创建nexus-data目录并更改UID为200:
mkdir nexus-data && chown -R 200 nexus-data
启动:
docker compose up -d
启动需要一定时间,期间可以使用如下命令查看日志:
docker compose logs -f
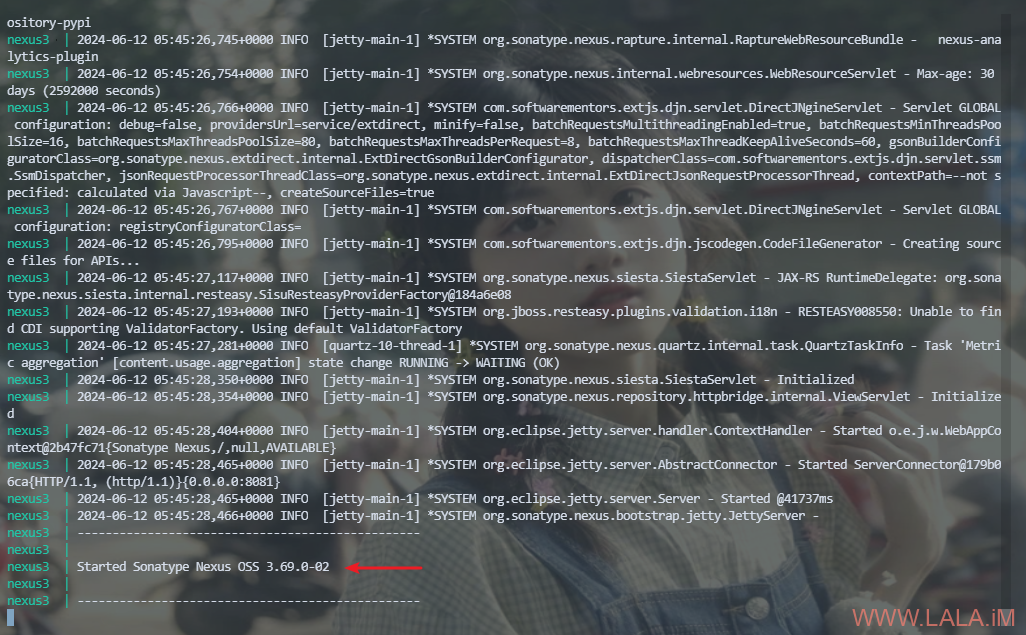
直到看到类似信息说明启动完成:
[备注]
如果启动失败,一般都是机器内存不足导致的,使用Nexus3,建议机器最低要有4GB内存。如果你觉得它吃的内存太多了,可以参考此页面内的说明添加一个环境变量对内存使用量进行限制:https://hub.docker.com/r/sonatype/nexus3/
查看初始的管理员密码:
cat nexus-data/admin.password
配置NGINX反向代理,新建NGINX站点配置文件:
nano /etc/nginx/sites-available/nexus3
写入如下配置:
server {
    listen 80;
    listen [::]:80;
    server_name nexus3.example.com;

    location / {
        proxy_pass http://127.0.0.1:8081/;
        proxy_set_header Host $host;
        proxy_set_header X-Real-IP $remote_addr;
        proxy_set_header X-Forwarded-For $proxy_add_x_forwarded_for;
        proxy_set_header X-Forwarded-Proto "https";
        client_max_body_size 0;
    }
}
启用站点:
ln -s /etc/nginx/sites-available/nexus3 /etc/nginx/sites-enabled/nexus3
签发TLS证书:
certbot --nginx --email [email protected] --agree-tos --no-eff-email
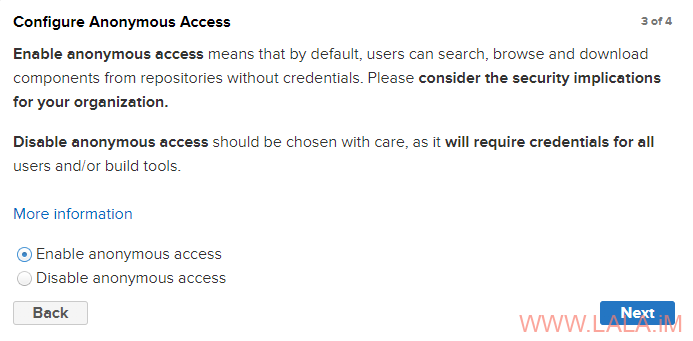
访问nexus3.example.com使用默认的管理员账号、密码登录,首次登录会提示修改新的管理员密码,接下来会提示是否启用匿名访问,这里选择启用:
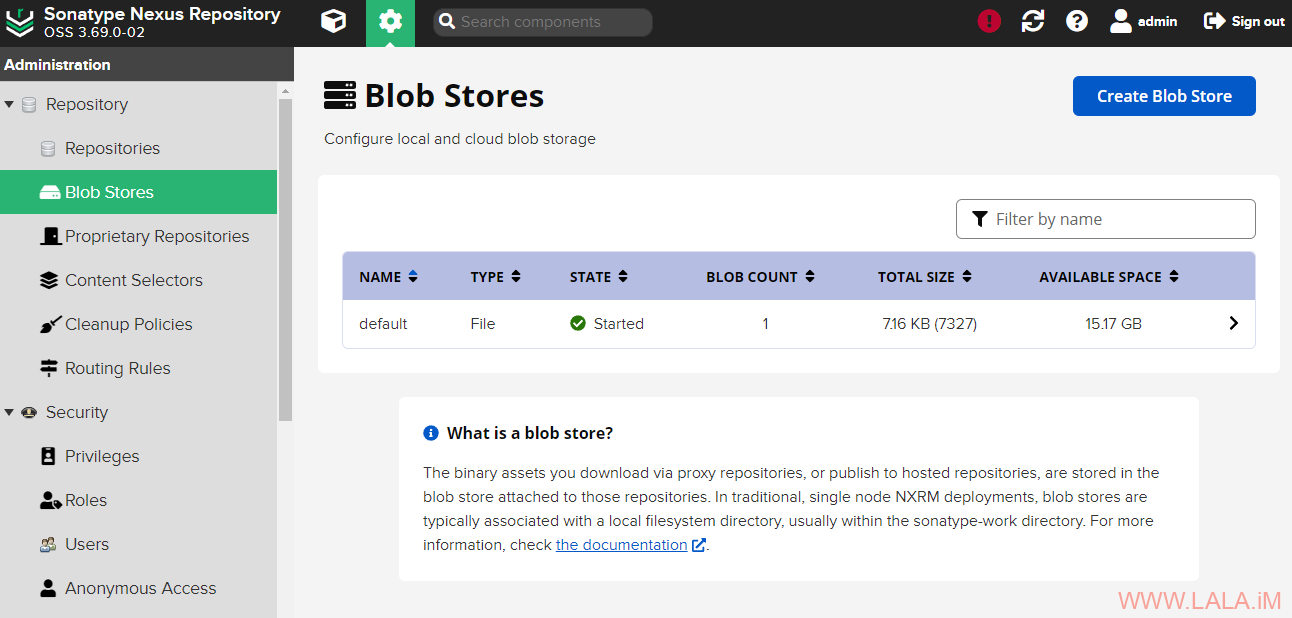
在创建Docker Repository之前,先创建一个Blob Store:
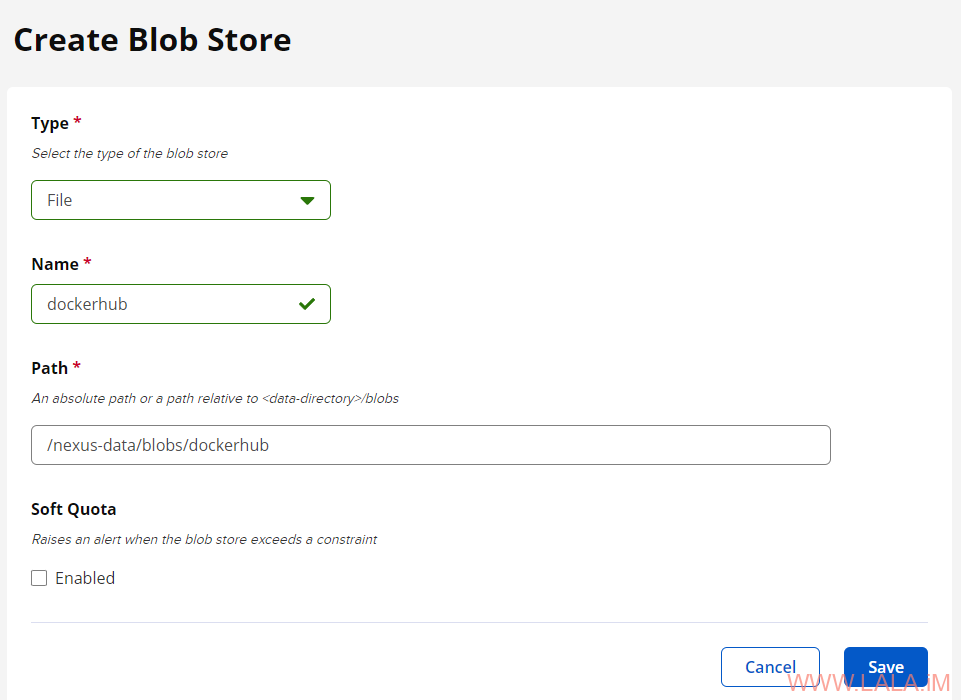
按照下图进行配置:
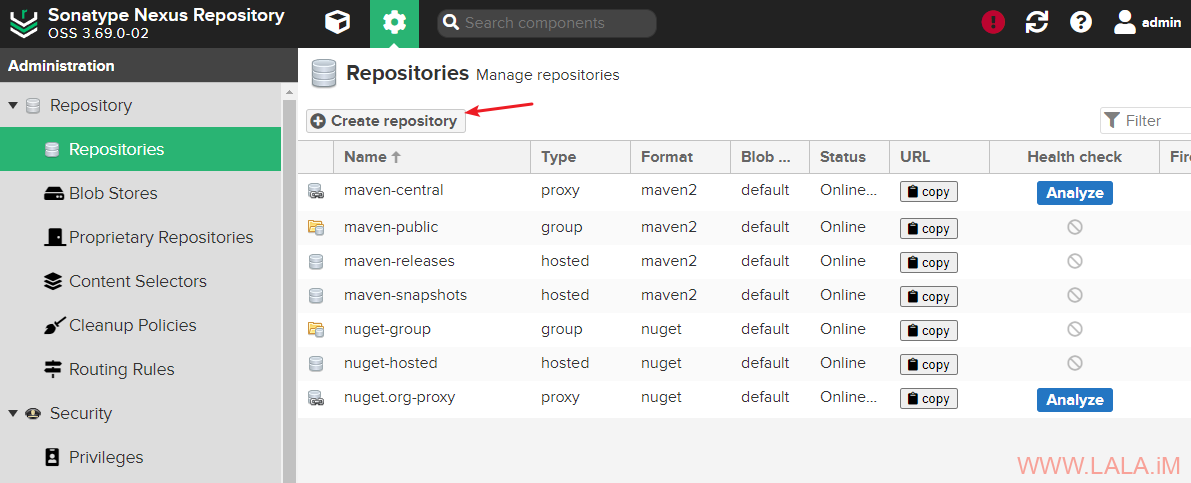
现在点击如图所示的按钮开始创建Docker Repository:
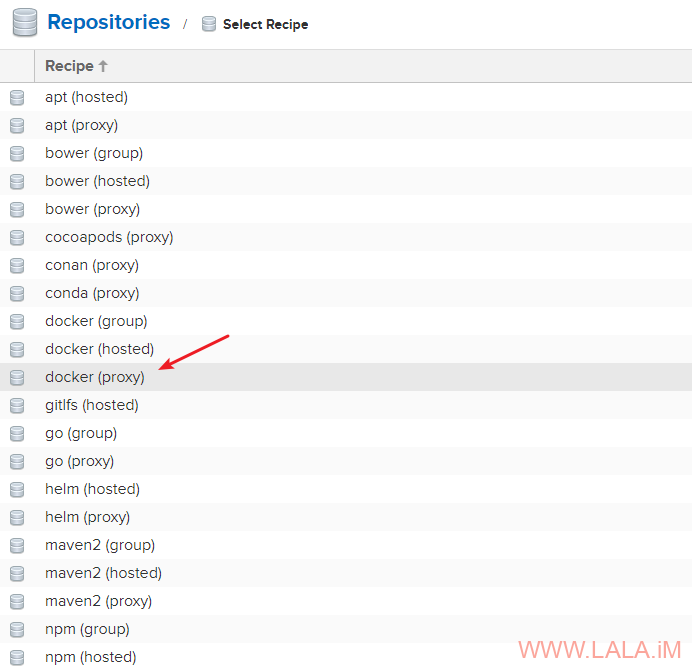
选择docker (proxy):
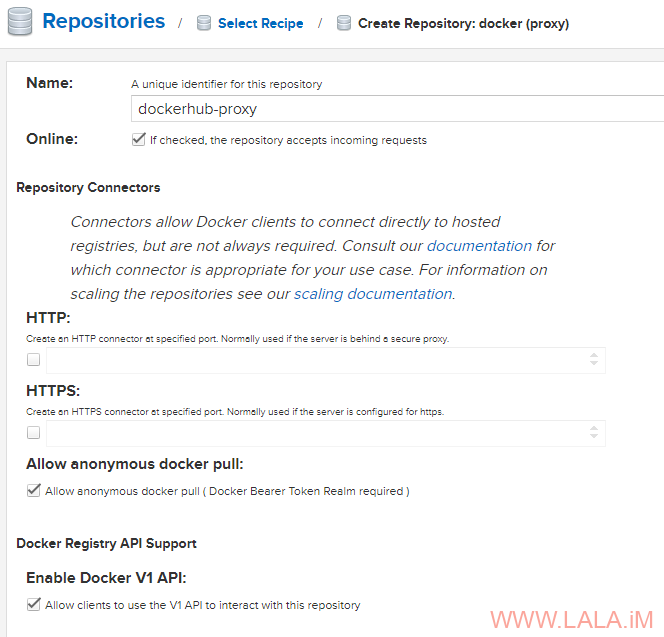
给这个Docker Repository起一个名字,本文示例为:dockerhub-proxy(这个名字将作为后续反向代理URL的一部分)
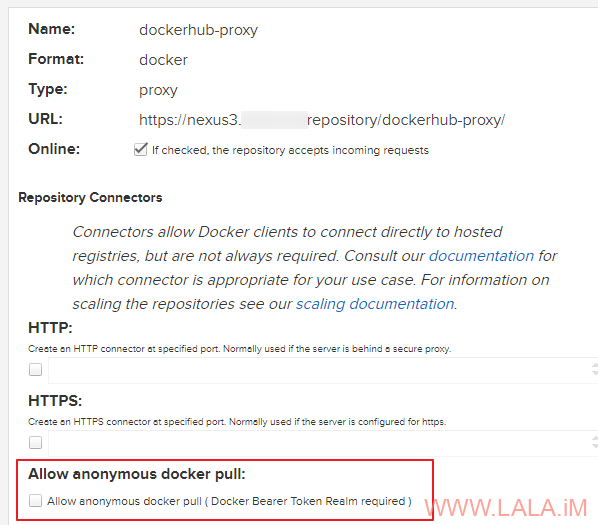
如果你想将此镜像服务完全公开,可以勾选Allow anonymous docker pull。
建议勾选Enable Docker V1 API。上述配置如图所示:
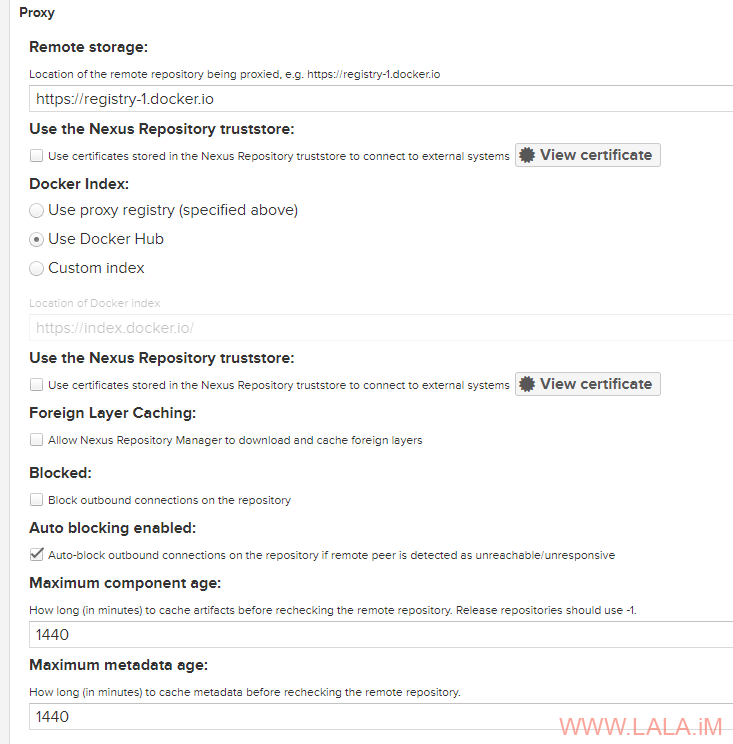
Remote storage,填写:https://registry-1.docker.io
Docker Index选择Use Docker Hub。上述配置如图所示:
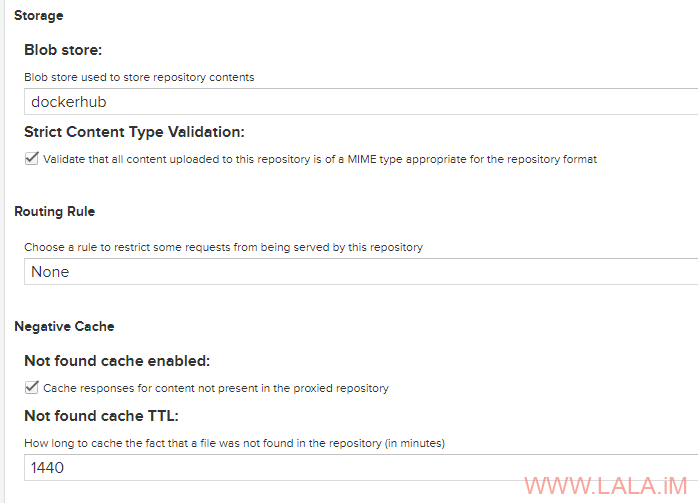
Blob Store选择刚才创建的:
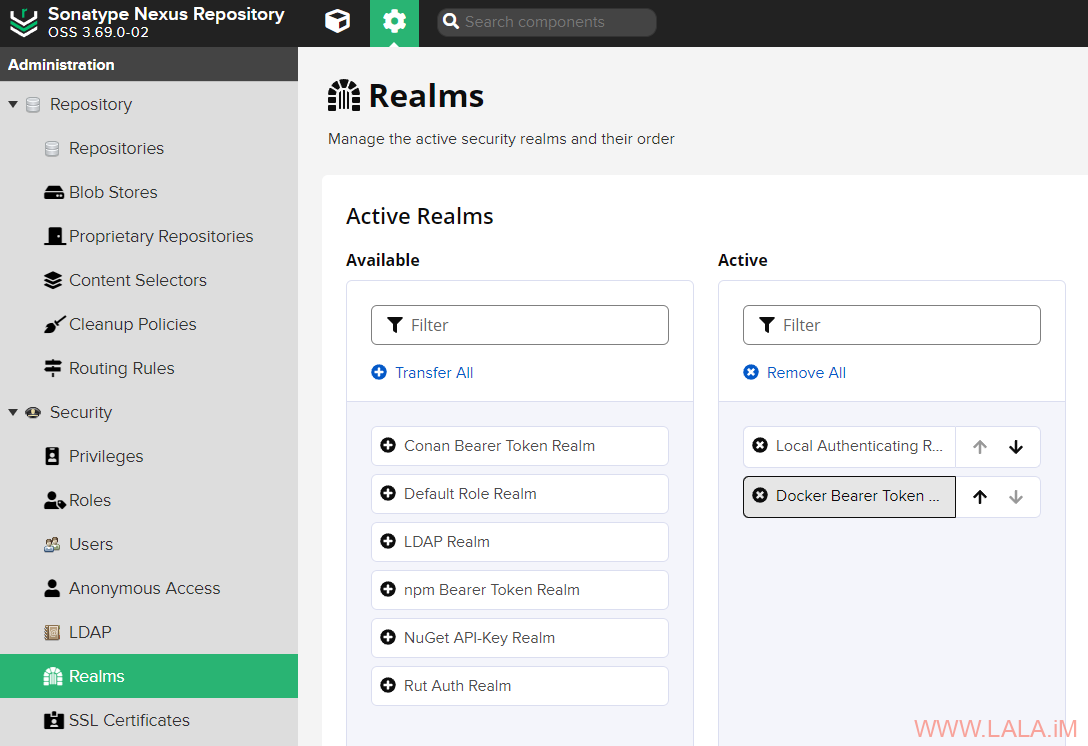
[重要]启用Docker Bearer Token Realm:
当Docker Repository启用Allow anonymous docker pull选项后,如果没有同时启用Docker Bearer Token Realm,则用户在pull image的时候会提示未授权。
为Docker Repository配置反向代理
为什么要配置反向代理,官方这篇文章做了很详细的解释,这里我就不重复说废话了:https://help.sonatype.com/en/docker-registry.html
这里个人建议给Repository配置反向代理的时候使用三级域名,因为你可能用Nexus3要创建多个Repository,只是为了平时更好的维护和区分。
新建NGINX站点配置文件:
nano /etc/nginx/sites-available/dockerhub-proxy-nexus3
写入如下配置:
server {
    listen 80;
    listen [::]:80;
    server_name dockerhub-proxy.nexus3.example.com;

    location /v2 {
        proxy_set_header Host $host:$server_port;
        proxy_set_header X-Real-IP $remote_addr;
        proxy_set_header X-Forwarded-For $proxy_add_x_forwarded_for;
        proxy_set_header X-Forwarded-Proto "https";
        proxy_pass http://127.0.0.1:8081/repository/dockerhub-proxy/$request_uri;
    }

    location /v1 {
        proxy_set_header Host $host:$server_port;
        proxy_set_header X-Real-IP $remote_addr;
        proxy_set_header X-Forwarded-For $proxy_add_x_forwarded_for;
        proxy_set_header X-Forwarded-Proto "https";
        proxy_pass http://127.0.0.1:8081/repository/dockerhub-proxy/$request_uri;
    }
}
启用站点:
ln -s /etc/nginx/sites-available/dockerhub-proxy-nexus3 /etc/nginx/sites-enabled/dockerhub-proxy-nexus3
签发TLS证书:
certbot --nginx --email [email protected] --agree-tos --no-eff-email
到这里就配置完成了,现在可以测试一下。
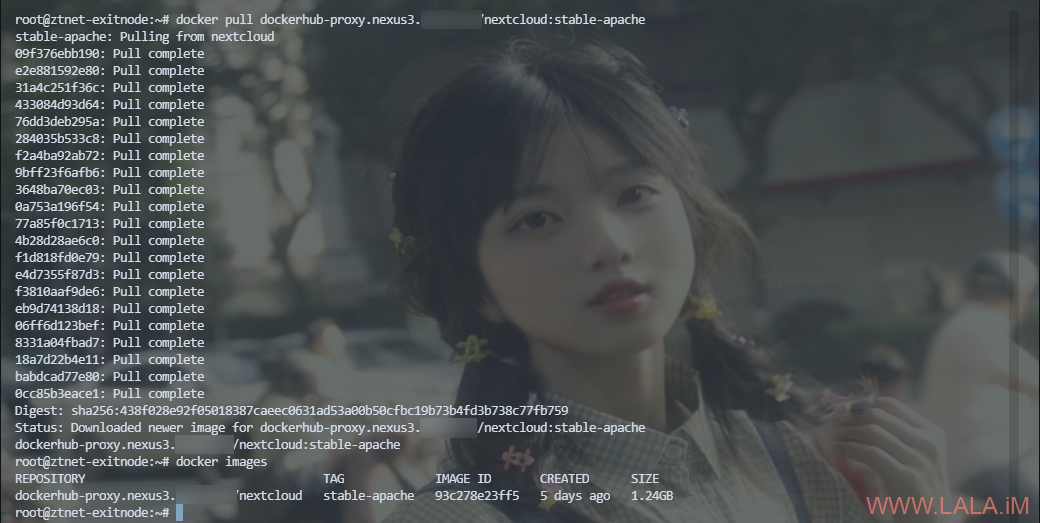
比如说现在要pull一个nextcloud的image,可以使用如下命令:
docker pull dockerhub-proxy.nexus3.example.com/nextcloud:stable-apache
可以看到是完全正常的:
私有Docker Repository
如果你只想将这个Docker Repository供自己使用,可以取消勾选Allow anonymous docker pull:
现在这个Docker Repository就需要登录才能使用了,你可以使用如下命令进行登录:
docker login dockerhub-proxy.nexus3.example.com
账号和密码就是Nexus3的管理员账号和密码。登录成功会有如下回显:
参考:
https://help.sonatype.com/en/proxy-repository-for-docker.html
https://help.sonatype.com/en/run-behind-a-reverse-proxy.html
https://help.sonatype.com/en/docker-repository-reverse-proxy-strategies.html
https://help.sonatype.com/en/docker-registry.html



最新评论
5211314
能不能教我 一点不会